Whether it’s about wood projects or decorating your living room with beautiful wood handicrafts, pattern transfer is an essential activity. Most DIY wood projects require wood printing. Wood handicrafts also require patterns to look attractive and pleasing.
It can be difficult to print patterns on wood, and they may be expensive as well. So, it is convenient and easy to transfer patterns from paper.
Although the method sounds difficult and time-consuming, it is quite simple. With some easy methods, you can easily learn how to transfer a pattern from paper to wood.
Transferring Pattern from Paper to Wood

There are different ways by which you can easily transfer patterns from paper to wood. Most of these methods are inexpensive and require supplies that are available at home.
But all methods may not work for all wood projects. It depends on the type of wood you’re using and the colors of the pattern as well.
So, emphasis should be given on these methods depending on what kind of wood you’re using and also the quality of the pattern prints. If you want the patterns to be as perfect and detailed as possible, the quality depends on the printer as well.
Keeping the quality of the wood you’re using and the quality of the prints of the patterns, you can transfer the pattern in the best possible manner.
Here are some of the methods you can use to successfully transfer patterns from paper to wood for your projects.
1. Using Transfer Paper

This method will work in the case of inkjet printers. Without an inkjet printer, you cannot work with transfer paper. This is because transfer papers are very thin and coated with pigment.
So, only an inkjet printer can bring out the true colors of the patterns on wood through transfer papers. These are also inexpensive and available locally, so they are the cheapest option.
To transfer the pattern to wood through transfer papers, you will require-
- Transfer paper
- Soft grip stylus
- Scissors
- Measuring tape
Measure the Wood Piece
Use a measuring tape to measure and then cut the transfer paper according to your preferred size.
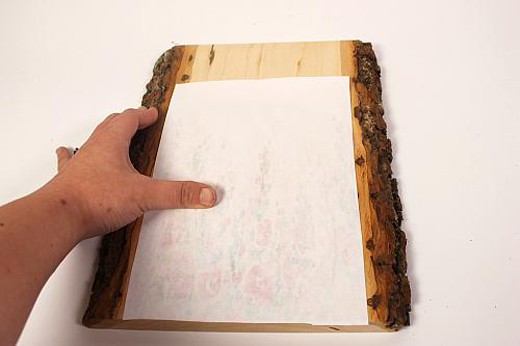
Keep the Transfer Paper between the Pattern and Wood Piece
Trace the lines of the pattern with a stylus very carefully. Do this in one stroke to avoid any wrong alignment of patterns. You can erase some of the edges out, but it will require careful handling as well.
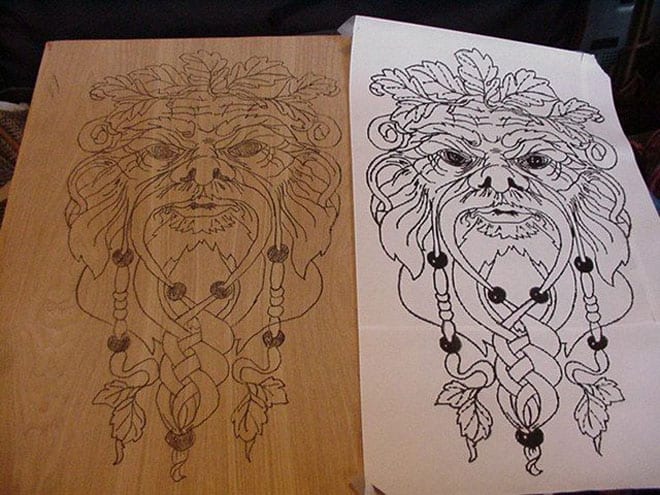
Take the Paper out and Check out the Pattern Imprinted on the Wood Piece
This will give a light grey toned effect on the wood since the transfer paper is too thin. It might take a few tries to practice with the stylus in one stroke, but it’s still worth it since the transfer paper is so cheap and comes in bulk.
And this is the cheapest method you can try for transferring patterns to wood. It is also great since you can practice multiple times before moving to the actual design.
2. Using Carbon Paper

Carbon paper or tracing paper is a paper available in almost all craft stores. It is a great paper for outlining images and can be used for tracing patterns on wood as well.
It is more convenient for people who do not have inkjet printers. So, it works great for non-inkjet printers easily.
To transfer the pattern to wood using this method, you need the following supplies-
- Carbon paper
- Soft grip stylus
- Scissors
- Measuring tape
Cut the Paper to Your Preferred Size
Firstly, you need to match the size of your wood piece with the size of the carbon paper and cut the paper accordingly. Avoid keeping extra space so that there is no maladjustment when it comes to transferring the patterns.
Place the Carbon Paper on the Wood Surface Properly
The glossy side of the carbon paper should be directed towards the wood surface.
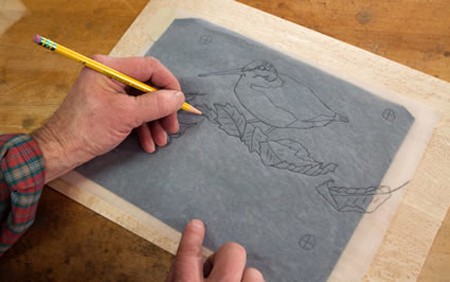
Keep the Pattern over the Carbon Paper and Trace It with the Help of the Stylus
Do this carefully to avoid errors and try completing in a single stroke. Although you cannot erase here like a transfer paper, you can use sanding pens to minimize the errors.
Compared to transfer papers, the results are bold and dark in effect due to the thickness of the carbon paper. This method is inexpensive as well and very easy to transfer patterns properly.
3. Tracing from the Back
This method applies to those who want simpler patterns on their wood with minimum supplies. It is more common among crafters and DIY enthusiasts because it’s so easy to do. For this method, you will need the following supplies-
- Pencil/chalk
- Ballpoint pen
Place the Paper
Firstly, place the patterned paper on the surface of the wood by aligning in a way that the pattern faces down on the wood surface.
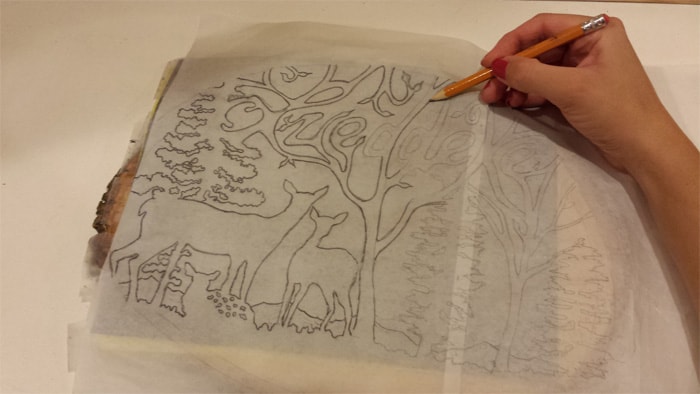
Use the Pencil or Chalk to Trace the Pattern Lines
This is called tracing from behind since the pattern is facing down the wood. And this will transfer the print directly to the wood. Although chalk is more useful to apply, you can also use a dark pencil for creating this pattern.
If the pattern hasn’t transferred properly, use a stylus to trace the lines again. During this process, be careful so that the pattern lines do not get mismatched.
Take the paper out and check the wood surface out. The pattern will have a greyscale effect on the wood, and it is still the easiest alternative to transfer paper.
Tips for Transferring Pattern to Wood
Although you can transfer patterns from paper to wood easily with these methods, some tips will help you in the process. These tips involve using the correct kind of wood as well as dealing with the wood surface properly. These tips are-
- Sand the Wood Properly
Wooden surfaces may not show the exact pattern if they are not sanded well. So, before any pattern transfer, use 60-grit papers to sand the wood surface properly. It will provide a uniform surface for pattern transfer.
- Use Lighter Wood for Pattern Transfer instead of Heavy and Thicker Wood
It will help the wood to grasp the pattern in single strokes. Heavier and thicker woods do not grasp the entire pattern in one stroke, and the pattern quality is lost in the process.
- Choose Inkjet Printers for Printing Your Patterns
Inkjet printers bring out the colors and details of a pattern image better than non-inkjet ones. So, always use inkjet printers for the pattern transfer.
- Add a Clear-Coat for Glossy Effect
You can add a clear coat or lacquer over the finished project to give the wood a glossier effect. This applies to lighter wood surfaces as well.
Following these tips, you can easily obtain a complete wood pattern by transferring from a paper in no time.
Conclusion
Bringing it to an end, it can be said that with certain techniques, a pattern can be transferred to wood from paper using minimum supplies.
Using these simple yet effective methods, you can have your desired wood project ready. You can easily learn how to transfer a pattern from paper to wood using these techniques.

